Being an artist, it seems tough to turn digital art into NFT format.
In fact, I was myself once trying to upload my NFT to a platform named Opensea.
But damn, they asked for gas fee which was around $20.
Being a beginner, I didn’t want to put that much money into it. So, I researched and found a free way as well.
In this article, I’m going to tell you both free and paid ways to turn digital art into NFT.
How to Turn Digital Art into NFT – The Regular Paid Way!
For the first method, I’ve chosen to work with OpenSea as it’s the most popular platform.
You can also explore other marketplaces and see which one you like the most!
Here’s a step-by-step guide for you to follow:
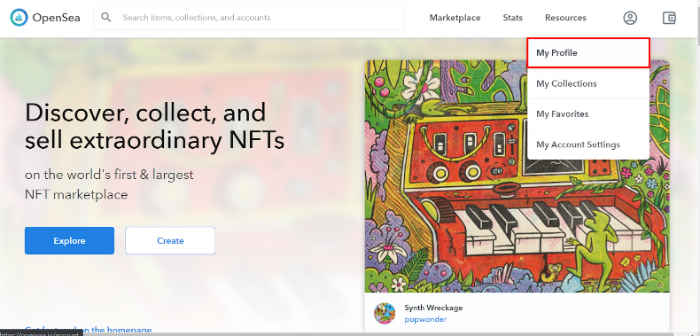
Step 1: Go to OpenSea & Create your Profile
Step 2: Connect an Ethereum Wallet to your OpenSea Account
You need a wallet to pay the platform for gas fees or to receive the payments.
I recommend you to go with the default wallet option – MetaMask.
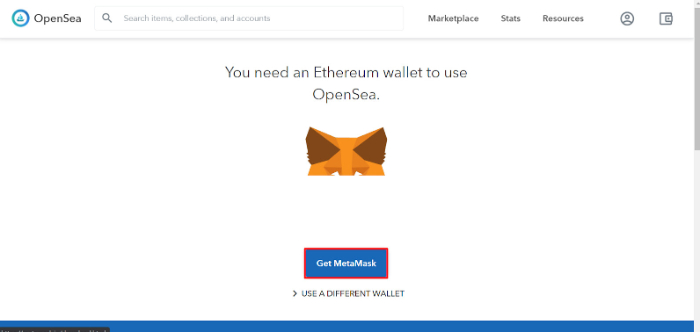
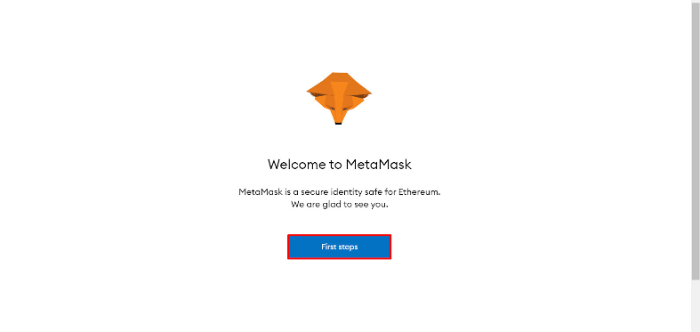
Step 3: Install MetaMask & Add its Browser Extension
Step 4: Create your Ethereum Wallet on MetaMask
Click on the blue button ‘First steps’ to create your wallet. Once you reach a new tab, type in your email address, name, and a unique password.
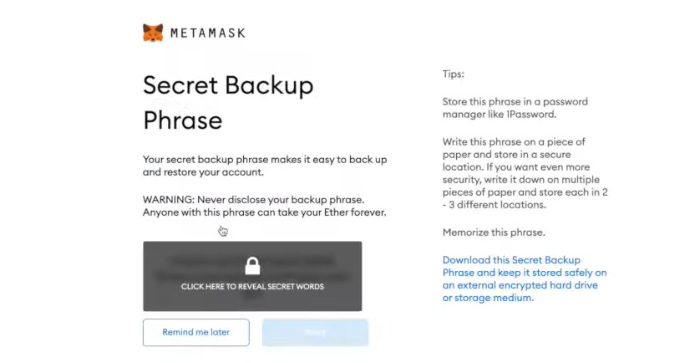
After mentioning the credentials, save the unique code displayed.
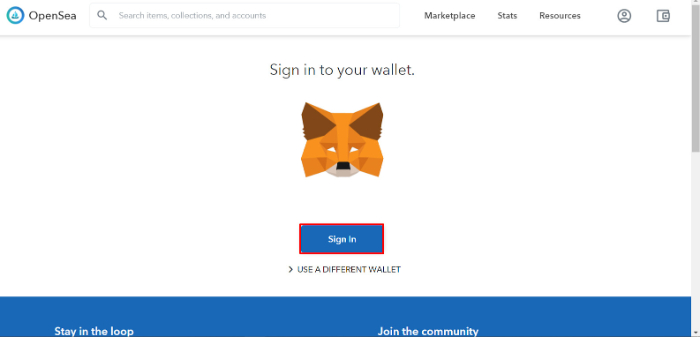
Step 5: Sign in to your Wallet from the OpenSea Page
After clicking on the Sign In button, a box will appear on the right side of your screen where you can type your wallet password to get started.
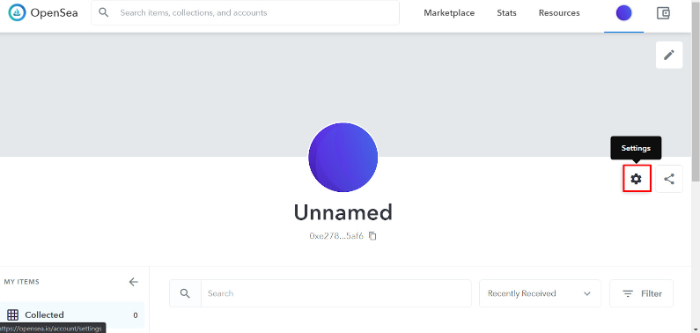
Step 6: Go the Settings & Complete your Profile
When you get to your profile homepage, click on the gear icon on the right side to go to settings.
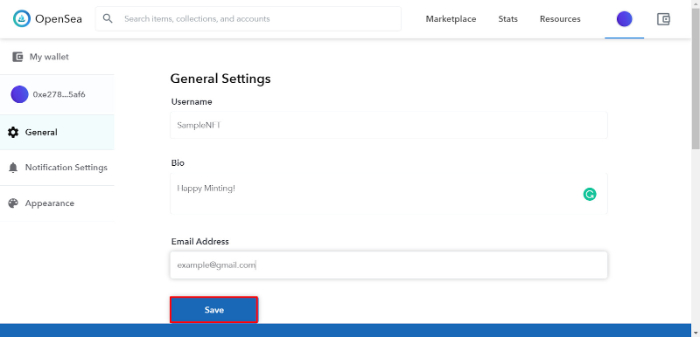
Here, you can add your username, bio, and email address. After that, click Save and move on to the next step.
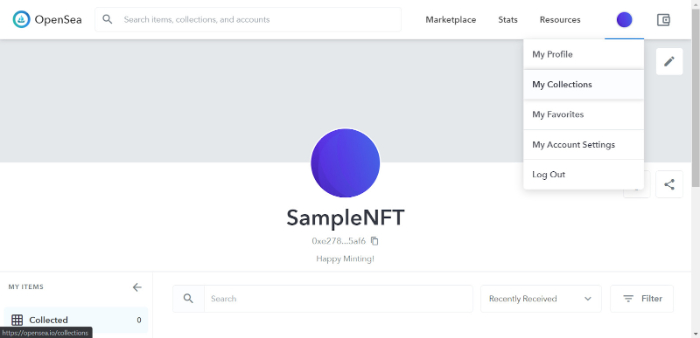
Step 7: Go to My Collections & Create a New Collection
To turn your digital art into NFT, add it to a pre-existing or a new collection.
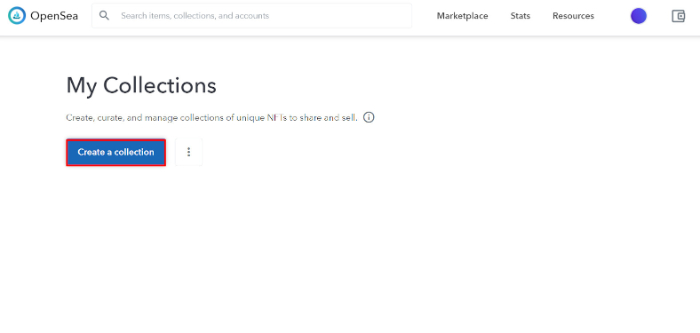
Now, click on the create collection button.
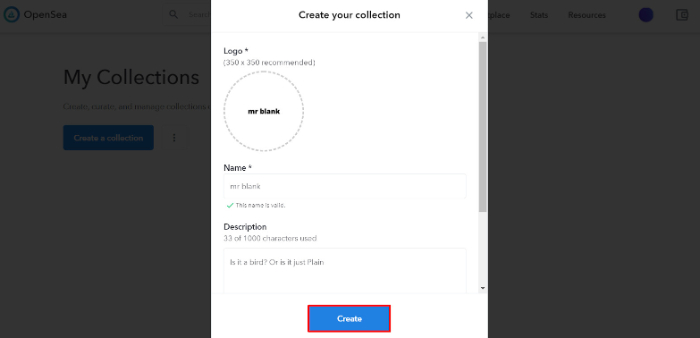
Step 8: Fill up the Information About this New Collection
You need to add a logo, name, and description to give your collection an identity. After you’re done, click on Create.
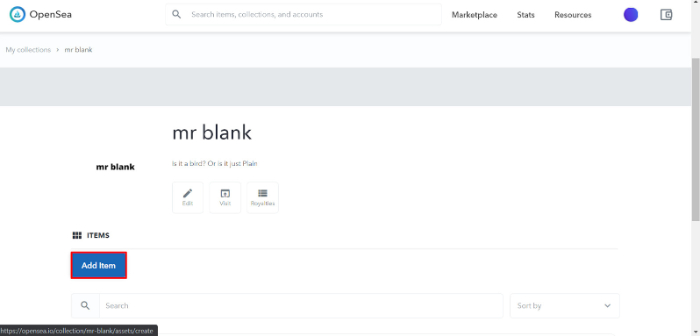
Step 9: Add your NFT to the Newly Created Collection
It’s time to turn your digital art into an NFT, click on Add Item to select your artwork.
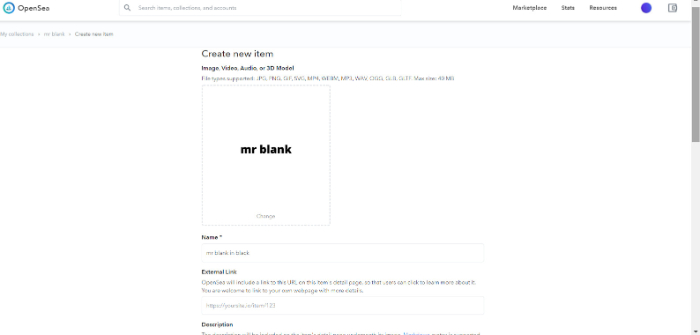
Step 10: Add the Basic Information & Enter all the Details About your Art
First, add basics like a name for your art, the image, an external link (if any), and a description.
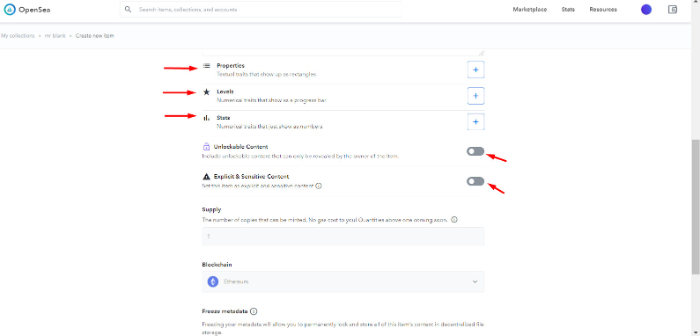
Additionally, specify other things like the properties, levels, and stats.
You can also add unlockable content that a buyer can unlock after the purchase.
Lastly, you can mention if the NFT is explicit or has any sensitive content.
If you’re done with that, you can click on the Create button at the bottom of your screen.
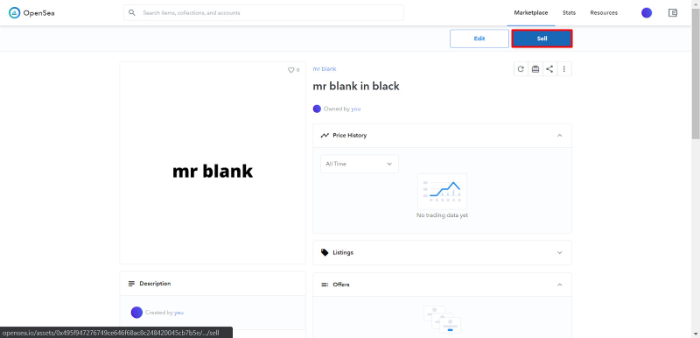
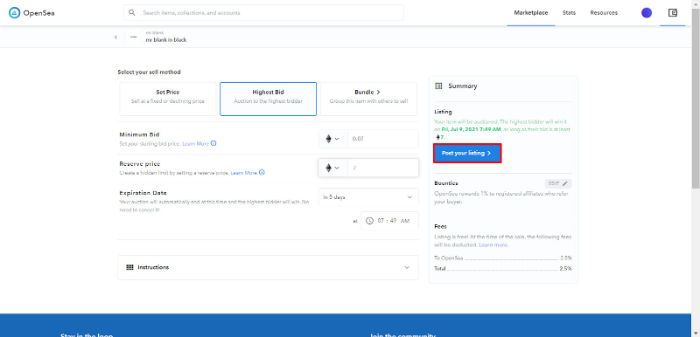
Step 11: Put the NFT on Sale & Choose Its Cost
Time to publish and make your NFT live! Click on the Sell button in the top right corner.
You can choose different types of auctions here with options to set a fixed price or have an auction with a minimum bid and a reserve price.
In addition to that, you can add this NFT to a bundle as well.
After choosing the method of auction, specify the expiration time for your listing.
Finally, click on Post your listing.
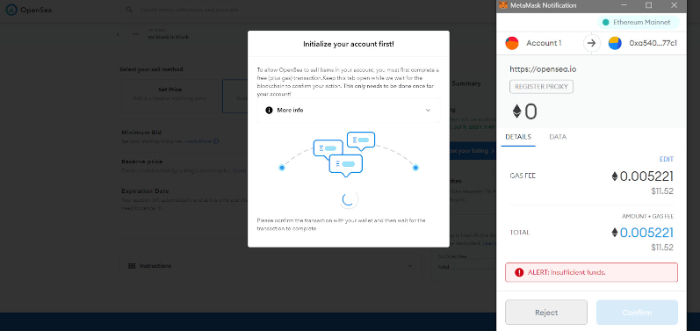
Step 12: Pay the Gas Fees for your Listing
As I said earlier, you need to pay the gas fees for your listing.
Here, your MetaMask extension will open up and show you the exact amount of ethereum you will need to pay and its value in USD.
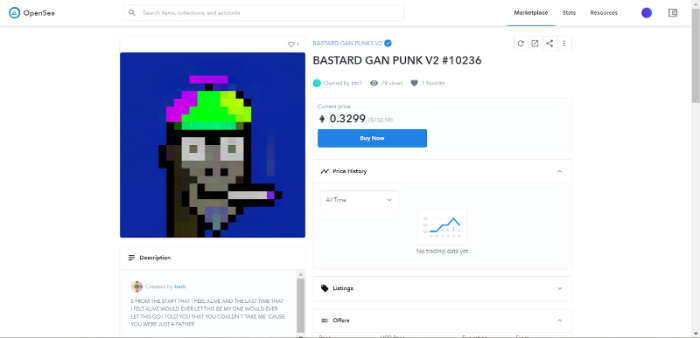
After the payment confirmation, your listing will look something like this:
That’s all there is for this method. Let’s get to the free method to turn your digital art into NFT.
How to Turn Digital Art into NFT without Paying Gas Fee
This method is a life-saver if the whole concept of ‘you need to have money to earn more of it with NFTs’ doesn’t fit right with your situation.
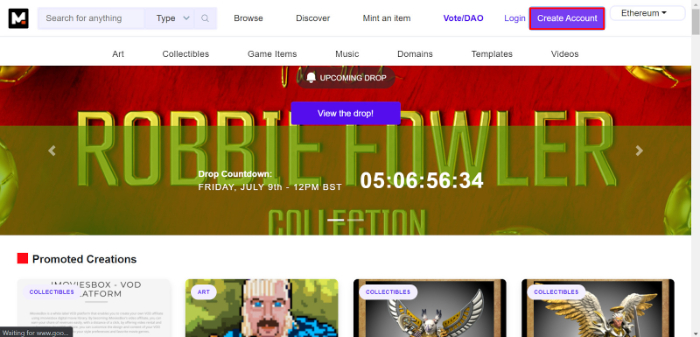
In this method, we’re going to cover another NFT marketplace called Mintable.
The great thing about Mintable is that you don’t need to pay any gas fees for your first 50 NFT listings!
Now I’m sure you’re eager to know how to get started. So, here’s how to list your digital art as an NFT on Mintable:
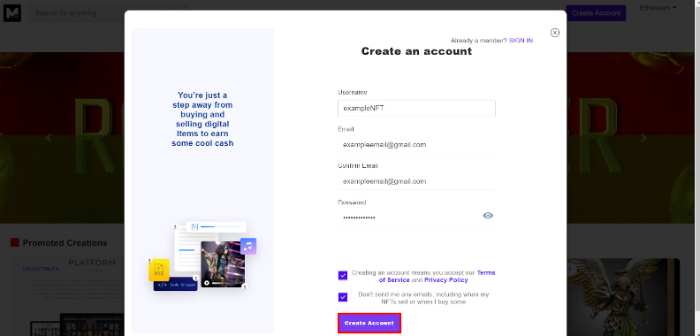
Step 1: Create an Account on Mintable
Visit the Mintable homepage and click on the Create Account button on the top right corner.
Add your username and email address along with a strong password to create the account.
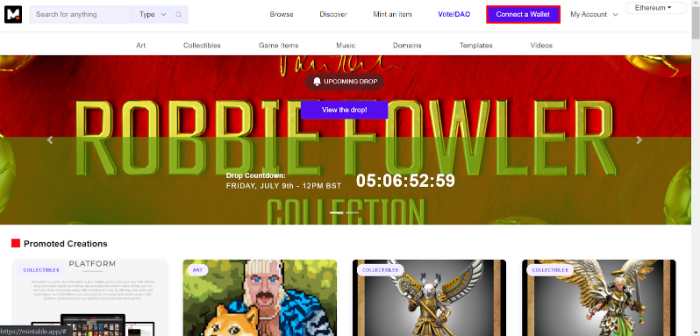
After creating and verifying your account, go to the home screen and log in to your account.
Step 2: Create or Connect a Wallet to your Mintable Account
You can create a MetaMask ethereum wallet as shown in the previous method or log in to an existing wallet.
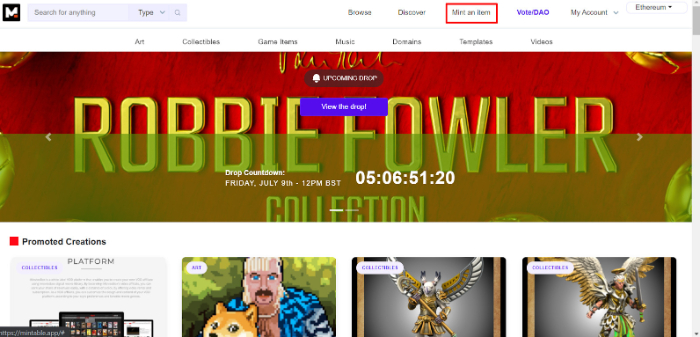
Step 3: Start Minting your NFT
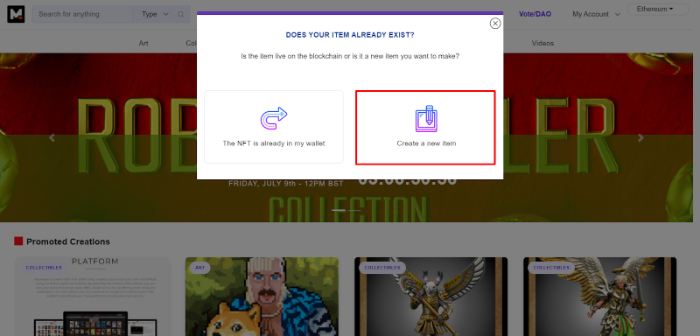
Click on the Mint an Item button on the menu bar.
Either choose an already listed NFT or create a new one.
We will go with the latter option though so that we can make a new one.
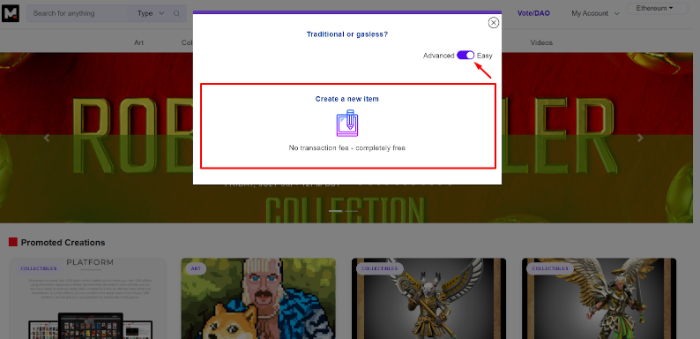
After choosing to create a new NFT, make sure the above option for Advanced or Easy is selected for easy.
Doing so will allow you to directly create an NFT that doesn’t require gas fees.
On the other hand, if you choose advanced, you will see an option to go with traditional minting that requires gas fees.
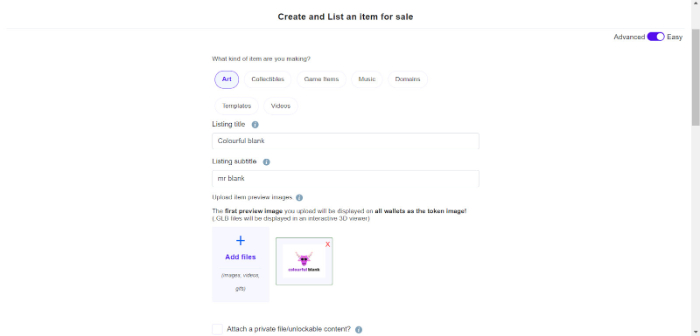
Step 4: Create the NFT listing & Fill up the Details
In this stage, you can access everything you need to list your NFT item.
First, mention the type of item you are minting and add a title along with a subtitle for your listing.
Next, upload the file you want to mint. Right after the upload, write a description for your item.
Now, this is where you choose how the auction will take place.
You have 3 options to list the NFT.
- Fixed price will allow you to set a predefined cost for your NFT.
- Auction will allow you to set a starting price and a reserved price.
- The Auction with Buy now option will let you set a starting price, a reserved price, and a buy now price that will allow the buyer to lock their purchase.
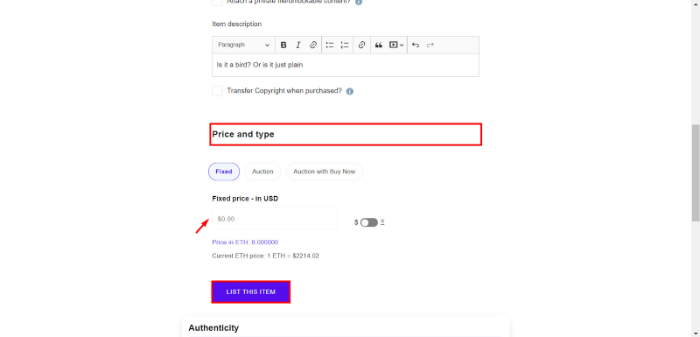
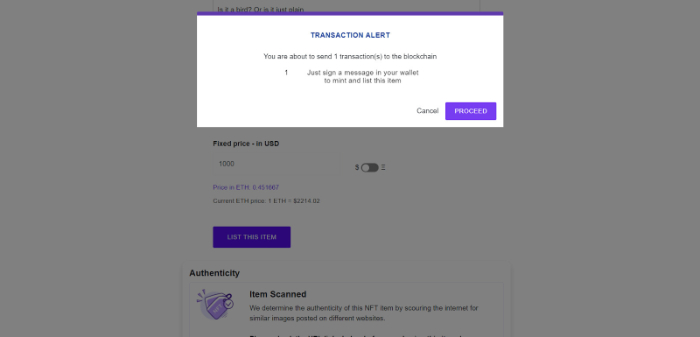
Once you’ve set all the parameters and described the listing, click on List This Item.
Step 5: Confirm the Transaction from your Wallet
Here comes the final step where you need to confirm the listing from your wallet.
Click on the Proceed button to follow through.
Once your wallet extension is open, click on Sign for final confirmation.
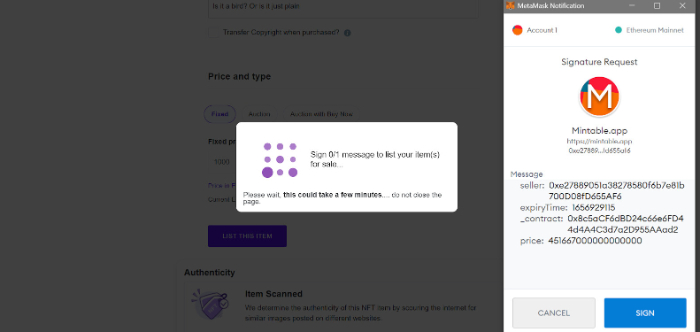
And Voila! You have successfully turned your digital art into NFT for free without any gas fees!

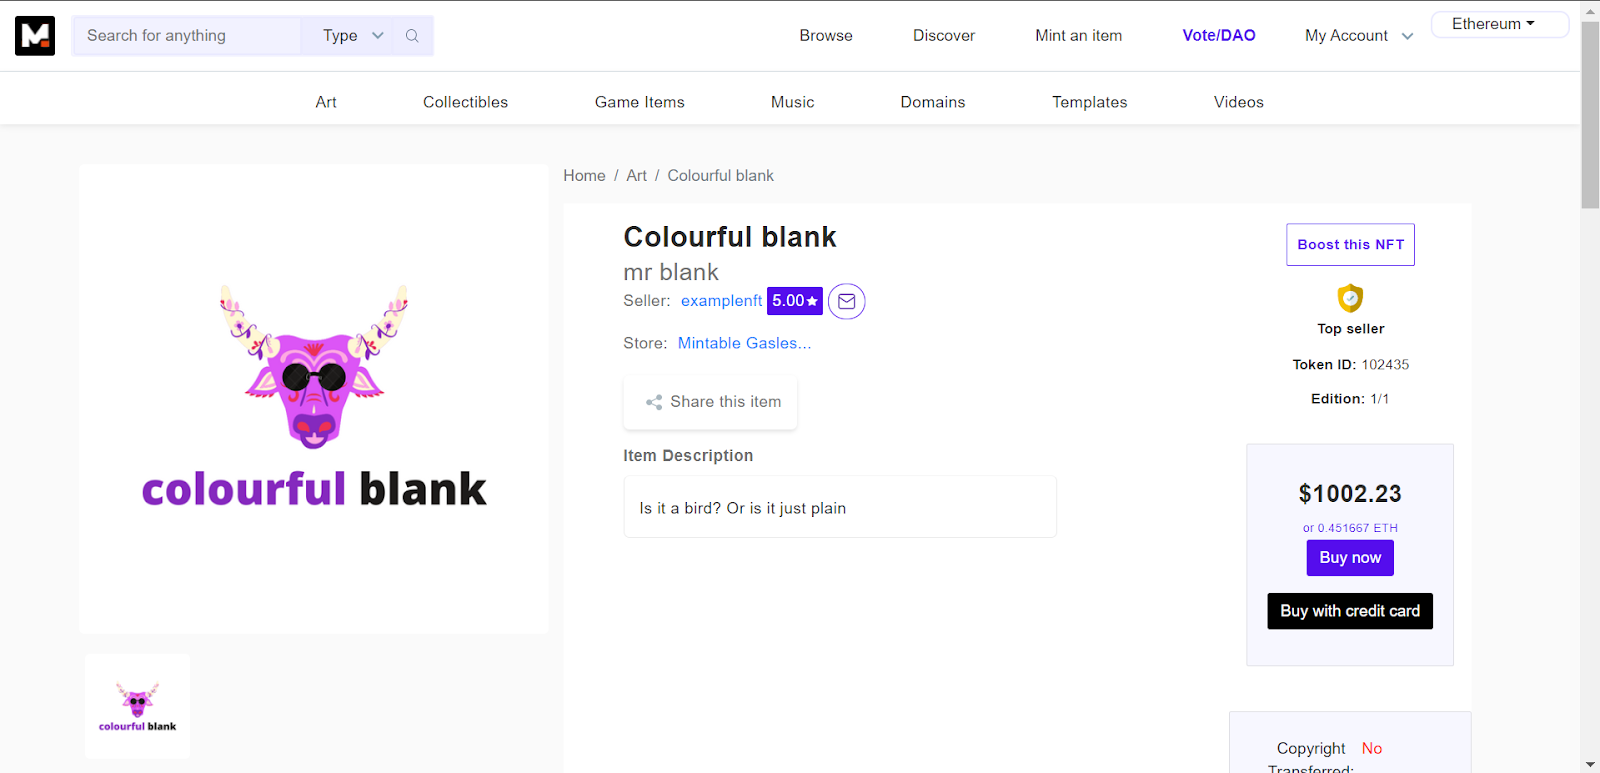
Once your listing is live, it will look something like this:
Which Way is Better for Artists? – Free or Paid?
So, we went through the 2 ways to turn digital art into NFT.
If my guess is correct, some of you might still be confused about which method to use for your first-ever NFT adventure.
In hindsight, both methods are great for artists who want to make some money from their talent.
If you’re already an established artist, you may be able to afford the gas fees that some of the top NFT marketplaces demand.
On the flip side, you might as well be an unknown or a beginner artist who can’t spend a few bucks just for listing their artwork.
In the end, it all boils down to how much you can afford to invest.
For instance, marketplaces like OpenSea and Rarible have hefty gas fees but also assure the buyers that your artwork is a no-nonsense NFT listing.
The same can’t be said about the free marketplaces.
As marketplaces like Mintable have no gas fees, there are NFTs by those artists who put a listing without any serious ambition to sell it.
This will create an unwanted clutter in the market that turns off the buyers.
Regardless, you can be sure that Mintable is still a fantastic marketplace where you can sell your NFTs for free.
Is it Enough to Publish Your NFT Online?
If you just want to turn your digital art into an NFT and make it go live, there’s not much else you need to do. However, if you want to actually sell your NFT, you need to do several other things.
The first thing that comes to mind is advertising your NFT.
You can’t advertise your NFT on most marketplaces like OpenSea. But yes, Mintable allows you to do so.
You can choose how long you want to advertise it and set a budget cap for it. If you want to advertise elsewhere, social media platforms are great for it as well.
Speaking of social media, you can also self-promote your NFT on networking sites like Reddit, Twitter, Facebook, etc.
Last but not the least, you can have a dedicated website for your NFTs to give prospective buyers a look at your story.
Other than that, you can still find many innovative ways to market your NFT.
Good Luck & Happy Minting!